Turn everything off first! Never try to add/remove an expansion card to/from a computer that is on. If you wave 24V wires around, you may damage components by short-circuiting them accidentally.
Please note that I may confuse +24V and +28V in this discussion - this is because the precise voltage isn't terribly important. As long as everything's the same, you can use either. (Note for those using Med Associates power supplies: Med Associates persist in referring to +28V and -28V lines, giving the impression that there's a 56V potential in total. This is nonsense; what they refer to as -28V, or sometimes as "28V ground", is 0V.)
Proceed through the following steps:
You may need...
| • | Wire of two colours (e.g. red for +28V, black for 0V). Ensure that the wire will take enough current; I use 3A multicored wire (multiple strands of copper rather than a single core make the wire stronger and more flexible; 3A is easily more current that is needed and 3A copper wire isn't too thick to manipulate easily). |
| • | Wire cutters/strippers |
| • | Something hard and thin (like a small screwdriver) for opening up the lever-operated terminals to insert your wire |
| • | A multimeter (voltmeter and continuity tester) |
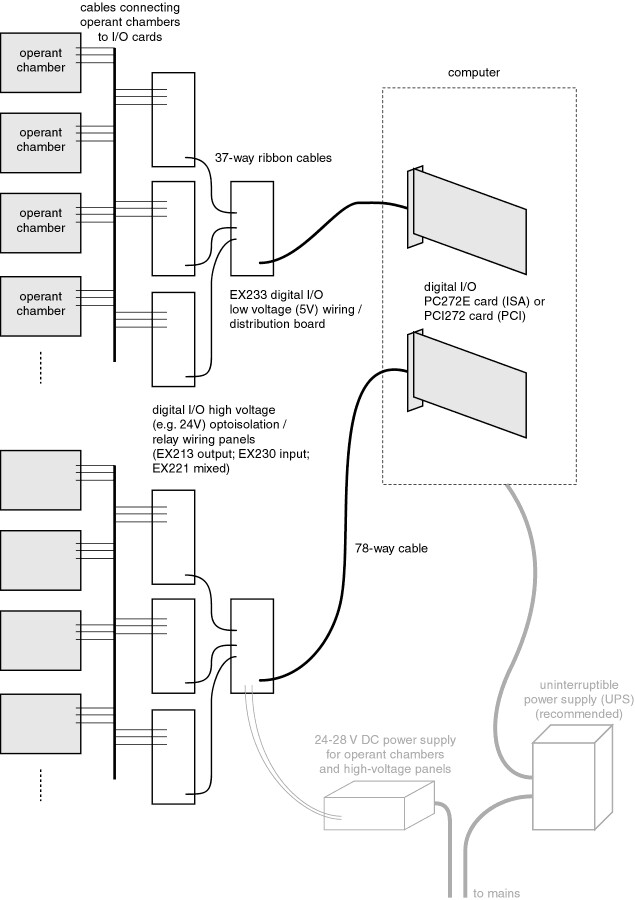
Schematic
This diagram shows the sort of thing you're aiming at with Amplicon digital I/O hardware.