About the task
The basic principle of a paired-associates learning task is to associate multiple pairs of stimuli, and test recall. An example from human games is the Klimt Memo game; you have a deck of 72 cards with 36 images from paintings by Gustav Klimt. You scatter the cards face-down on a table. Each player turns over cards two at a time, trying to remember where each image is; if you turn over two identical cards, you remove the pair from the table; otherwise, you replace them in the face-down position. The objective is to turn over as many matching pairs as possible. The basic association being tested is a {stimulus, location} pair, and you must remember many of these to do well in the game.
Both the human and monkey versions of CANTAB use a stimulus-location pair. One might call the test "delayed matching-sample-to-location". In human CANTAB, subjects are first shown up to 8 stimuli in different locations around the edge of the screen. In the test phase, they are then shown a series of single stimuli in the centre of the screen and asked to indicate the location in which each stimulus was presented in the first phase. In monkey CANTAB, only 4 locations are used and the exemplar is not in the centre of the screen; instead, the exemplar is shown in every possible location and the monkey must choose the one location in which that stimulus was previously shown. For the task to be described as PAL, >1 stimulus must be used (otherwise it's just delayed matching to location).
The rat version presented here offers up to three locations.
The sample stage begins with the Marker 1 sound; thereafter, individual stimuli are presented. The subject may be required to touch them. After all the stimuli have been sampled, there is a "memory delay". The choice phase begins with the Marker 2 sound. The subject will be offered multiple choices, one for each stimulus that was seen in the sample phase. Each time, the subject must touch the location in which that stimulus appeared in the sample phase.
Configuring the task
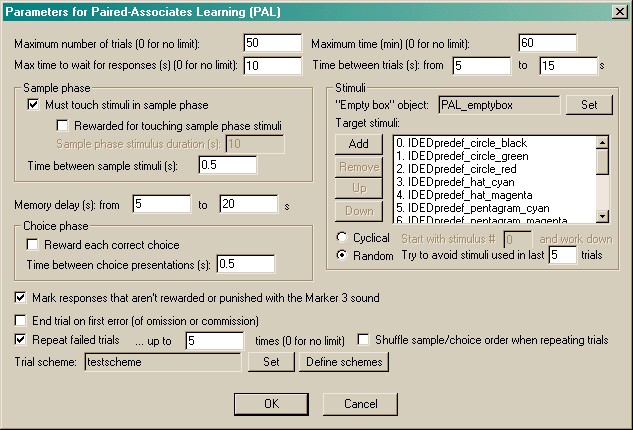
| • | Maximum number of trials. When the subject has performed this number of trials, the task ends. (You may specify 0 for no limit, though you must specify a limit on the number of trials, the time, or both.) |
| • | Maximum time. When this time elapses, the task is terminated as soon as the current trial has finished. (You may specify 0 for no limit, though you must specify a limit on the number of trials, the time, or both.) |
| • | Maximum time to wait for a response. If the subject fails make a response within this time, the subject fails the trial. (This time limit applies to the sample phase only if you require your subjects to touch the sample stimulus; it always applies to the choice phase.) |
| • | Time between trials. Specify a minimum and a maximum intertrial time (they may be the same). The actual time is chosen with a rectangular probability distribution within these values. |
| • | Must touch stimuli in sample phase. If this is selected, then the subject must respond to each sample stimulus. If you choose this option, you may also choose whether or not the subject should be rewarded for touching sample stimuli. If you do not want your subject to have to touch the stimulus, you must specify the Sample stimulus duration instead. |
| • | Time between sample stimuli. This is the time between consecutive sample stimuli. |
| • | Memory delay. This is the time between the last sample stimulus and the first of the choices. Specify a minimum and a maximum time (they may be the same). The actual time is chosen with a rectangular probability distribution within these values. |
| • | Reward each correct choice. If this is selected, every time the subject makes a correct choice (in the choice phase, obvoiusly), it gets reward. If this option is not selected, subjects only get rewarded at the end of the trial if they have not made any choice errors. Regardless of this option, any time the subject makes an error, it is punished (as specified in the General Parameters). |
| • | Time between choice presentations. This is the time between consecutive choice presentations. |
| • | Mark responses that aren't rewarded or punished with the Marker 3 sound. If this is chosen, then any responses that are neither rewarded nor punished are marked with the Marker 3 sound (as specified in the General Parameters). |
| • | End trial on first error. If this is selected, then whenever the subject makes a mistake, the trial ends. |
| • | Repeat failed trials. If this is selected, then if the subject fails to get all the choice presentations correct (or if you have "End trial on first error" selected and it gets something wrong in the sample phase) then the trial will be repeated. Set the number of times a trial may be repeated, too. Optionally, the order in which samples and choices are presented can be shuffled for repeated trials (while holding the stimulus-location pairs constant); to do this, tick Shuffle sample/choice order when repeating trials. |
| • | Trial scheme. Trial schemes define the number and type of trials you will use. Click Set to choose a trial scheme. Click Define to define trial schemes. See below for details. |
| • | "Empty box" stimulus. Choose the stimulus to be used as an "empty box" marker (for more details, see "Block Specification", below). |
| • | Stimuli. This shows the list of available stimuli. You cannot put a stimulus into the list more than once. Click Add and Remove to add/remove stimuli. You can also choose one of two methods for choosing the stimuli for each trial: |
| • | Cyclical. The program begins with a specified stimulus number and selects stimuli for each trial by working down the list, resuming at the start of the list if/when it runs out of stimuli to use at the bottom of the list. |
| • | Random. The program picks a set of stimuli to use at random on each trial. You will need to fill in "Try to avoid stimuli used in last X trials"; the program will try not to choose any stimuli that have appeared (or were scheduled to appear, in the case of failure at phase 1) in the last X trials. |
It's your responsibility to ensure that enough stimuli are in the list! The program will complain if you try to start it and there aren't enough stimuli to provide a unique stimulus in each location for every trial in your scheme. It won't complain if it needs to re-use stimuli from trial to trial.
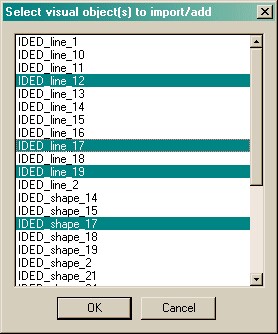
Incidentally, when you Add stimuli, you can choose several at once by holding down the Shift key as you click on stimuli:
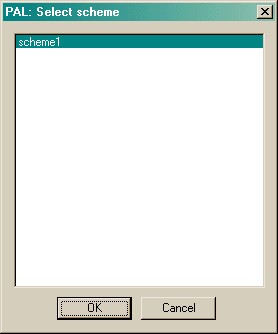
Set trial scheme
When you click this button, you can choose from a list of defined trial schemes.
Trial schemes
When you click Define schemes from the main parameters dialogue box, you can see the schemes. You may add, remove, copy, and rename schemes. Click a scheme and then click Define scheme to edit one particular scheme.
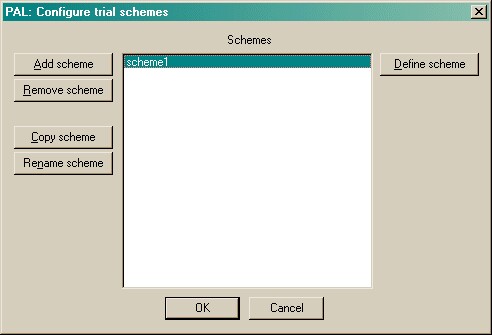
If a scheme is mis-configured, a warning message will appear when you click on the scheme.
Define scheme
When you click this button, you can edit an individual scheme. Schemes consist of blocks of trials. Here, there are two blocks. You may add, remove, copy, and re-order blocks. Click Define block to edit one particular block.
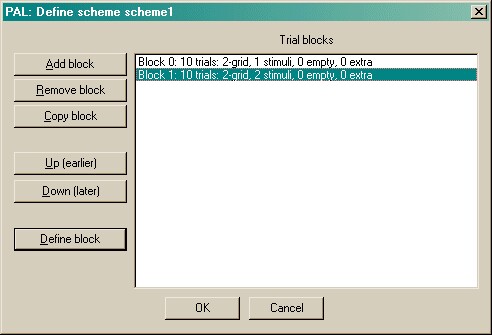
If a block is mis-configured, a warning message will appear when you click on the block.
Block specification
Here's where you can edit the block.
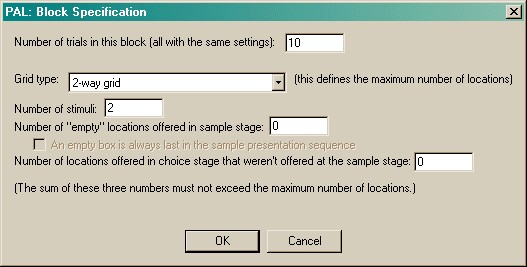
| • | Number of trials. Set the number of trials in this block. All these trials will run with the same settings (though individual stimuli and locations will be chosen at random for each trial within the block). |
| • | Grid type. Choose from a variety of grid patterns; this setting determines the number of available locations (actually, in the rat version of the task, it's always 2). The three numbers that follow must not add up to more than the number of available locations! |
| • | Number of stimuli. The number of stimuli presented in the sample and choice phases. |
| • | Number of "empty" locations offered in sample stage. You may show the "empty box" object at a number of locations in the sample phase, if you wish. This can be useful to enforce responding to particular areas of the screen. Set this number here. |
| • | An empty box is always last in the sample presentation sequence. This option allows you to enforce the rule that one of the empty boxes will always be shown last in the sample phase. |
| • | Number of locations offered in the choice stage that weren't offered at the sample stage. In the choice phase, the task will always use the locations in which sample stimuli were presented (that's obvious), and it'll also use the locations at which you displayed the "empty box" in the sample phase, if any. You can also offer locations in the choice phase that were never offered in the sample phase. Choose that number of extra locations here. |
To remind you: the sum of the last three numbers musn't exceed the number of locations available in the grid type you've selected; otherwise, warnings will appear showing that your scheme/block is mis-configured.
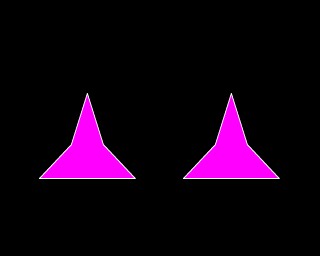
Screenshots from the task
This is a very simple example, with two stimuli, no "empty boxes" shown in the sample phase, and no extra locations offered in the choice phase.
Sample phase


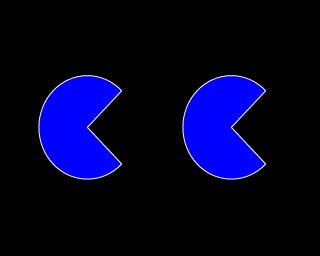
Choice phase.